TravelBestForyYou.com
Contents
hide
Hey there, fellow wanderlusters and aspiring phone photographers! 📱✈️ Ever found yourself in a breathtaking location, whipped out your trusty smartphone, snapped a quick pic, only to later realize it looks… well, kinda meh? Trust me, I’ve been there, done that, and bought the tacky souvenir t-shirt to prove it. But fear not! Your days of mediocre travel shots are about to become a thing of the past.
Picture this: You’re standing atop a sun-drenched cliff, the azure waves crashing below, a gentle breeze tousling your hair. It’s a moment you want to capture forever, to share with friends, family, and let’s be honest, to make your Instagram followers green with envy. But how do you translate that awe-inspiring scene into a photo that does it justice? How do you take good travel photos with your phone that truly capture the essence of your adventures?
Well, my globe-trotting friends, you’re in luck! I’m about to spill the beans on how to transform your smartphone into a magic wand of visual storytelling. We’re talking tips, tricks, and techniques that’ll have you shooting like a pro faster than you can say “cheese” in 27 different languages.
But before we dive in, let’s address the elephant in the room: Yes, your phone can take amazing travel photos. Gone are the days when you needed a bulky DSLR and a sherpa to carry all your gear. Today’s smartphones are pocket-sized powerhouses, capable of capturing stunning images that’ll make your memories pop and your social media sing.
According to a 2024 survey by TravelTech Insights, a whopping 87% of travelers now rely solely on their smartphones for vacation photography. And why not? With each passing year, phone cameras are getting smarter, sharper, and more feature-packed. It’s like having a photo studio in your pocket, minus the cranky photographer and overpriced props.
So, whether you’re a seasoned globetrotter or a newbie adventurer, buckle up (or should I say, charge up?) as we embark on this pixel-perfect journey. By the time we’re done, you’ll be armed with the know-how to turn every trip into a visual feast. Ready to level up your travel photography game? Let’s get snapping!
1. Master the Basics: Composition is Key
Alright, let’s kick things off with the bread and butter of great photography: composition. Now, I know what you’re thinking. “Composition? Sounds boring. Can’t I just point and shoot?” Well, sure, if you want your photos to look as exciting as watching paint dry. But trust me, once you get the hang of these simple tricks, you’ll be composing shots like Picasso with a smartphone.
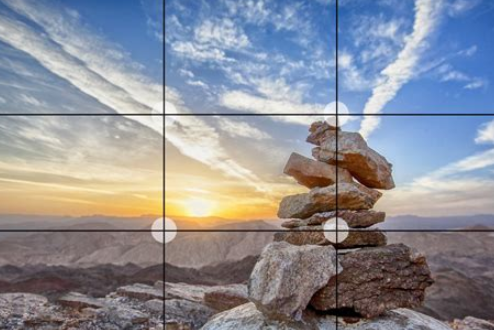
First up, the rule of thirds. Imagine your phone screen divided into a 3×3 grid (psst… most phones actually have this feature built-in). The magic happens when you place your subject along these lines or at their intersections.
It’s like giving your photo a visual sweet spot. Try it with that stunning sunset or that charming local you met at the market. You’ll be amazed at how much more balanced and interesting your shots become.
But hey, rules are made to be broken, right? Once you’ve mastered the rule of thirds, feel free to rebel. Sometimes, a perfectly centered subject can create a powerful, symmetrical image. It’s all about what feels right for the scene.
Next, let’s talk about leading lines. These are natural lines in your environment that guide the viewer’s eye through the photo. Think winding roads, railway tracks, or even a line of trees. Use these to draw attention to your main subject or to create a sense of depth and perspective. It’s like laying out a visual red carpet for your viewers’ eyes to follow.
And don’t forget about framing! No, I’m not talking about hanging your phone pics on the wall (though that’s not a bad idea). I mean using elements in your environment to create a natural frame around your subject. Archways, windows, tree branches – they all work wonders. It’s like giving your photo its own little stage.
Remember, the goal here is to create images that tell a story, that make people pause mid-scroll and say, “Wow, I wish I was there!” So take your time, play around with different angles, and don’t be afraid to get a little creative. After all, the best thing about digital photography is that you can always delete the duds!
2. Light It Up: Harnessing Natural Light
Alright, photography enthusiasts, let’s shed some light on the subject – literally! When it comes to taking good travel photos with your phone, understanding light is like having a superpower. And the best part? Mother Nature provides the most flattering light show, absolutely free of charge!
First things first, let’s talk about the golden hour. No, it’s not happy hour at your local pub (though that can lead to some interesting photos too). The golden hour refers to the period shortly after sunrise or before sunset when the light is soft, warm, and absolutely magical. It’s like nature’s own Instagram filter, bathing everything in a dreamy, golden glow.
During golden hour, shadows are longer and softer, creating depth and dimension in your photos. Colors appear richer and more vibrant. It’s the perfect time to capture landscapes, portraits, or those enviable “feet in the sand” shots. Pro tip: Plan your day around these golden hours. Yes, it might mean dragging yourself out of bed at an ungodly hour, but trust me, when you see those ethereal shots, you’ll forget all about your lost beauty sleep.
But what if you can’t shoot during golden hour? Fear not! Midday sun, often considered the villain of photography, can be your friend if you know how to work with it. Look for interesting shadows to add drama to your shots.
Or seek out shaded areas for more even lighting. And don’t forget about backlighting – positioning your subject with the sun behind them can create stunning silhouettes or beautiful rim lighting effects.
Now, let’s address the elephant in the room – or should I say, the clouds in the sky. Overcast days are actually a secret weapon for phone photography. The clouds act like a giant softbox, diffusing the light and eliminating harsh shadows. It’s perfect for portraits or capturing the vibrant colors of a local market.
But what about those tricky low-light situations? You know, like that cozy candlelit dinner or that mysterious ancient temple? This is where your phone’s night mode comes in handy. Most modern smartphones have this feature, and it’s like giving your camera night vision goggles. Just remember to keep your hand steady – or better yet, use a small tripod or lean your phone against something stable.
Remember, light isn’t just about brightness – it’s about mood, atmosphere, and storytelling. So next time you’re out exploring, take a moment to observe how the light is playing around you.
Is it casting interesting shadows? Creating a warm glow? Reflecting off surfaces? Once you start seeing light, you’ll start seeing photo opportunities everywhere. And that, my friends, is when the magic really happens!
Maldives Alternative Beach Destinations for Every Traveler: Hidden Gems Await
3. Get Up Close and Personal: Mastering Phone Camera Features
Alright, tech-savvy travelers, it’s time to get intimate with your phone’s camera. No, not that kind of intimate (though I won’t judge if you whisper sweet nothings to your device). I’m talking about really getting to know the features and capabilities of your smartphone camera. It’s like dating your phone’s camera – the more you understand it, the better your relationship (and your photos) will be!
First up, let’s talk about focus. Most phone cameras these days have touch-to-focus capabilities. Use this! Tap on your main subject to ensure it’s sharp and clear. But don’t stop there – many phones also allow you to adjust exposure after focusing. Just tap and hold, then slide your finger up or down to brighten or darken the image. It’s like having a mini lighting studio at your fingertips.
Next, let’s zoom in on… well, zoom. While optical zoom is best, digital zoom has come a long way. But use it sparingly – too much zoom can lead to grainy, pixelated images faster than you can say “enhance!” Instead, try getting physically closer to your subject when possible. It’s not just about filling the frame; it’s about capturing details, textures, and emotions that might be lost from a distance.
Now, let’s get a little fancy with some modes. Portrait mode, available on many smartphones, is like having a professional photographer in your pocket. It creates that coveted blurry background (bokeh) effect, making your subject pop. Perfect for those candid street portraits or shots of your travel buddy looking pensively into the distance.
But wait, there’s more! Panorama mode is your best friend for capturing sweeping landscapes or bustling cityscapes. And don’t forget about burst mode for action shots – hold down that shutter button and let your phone capture a rapid series of images. You can pick the best one later, or even create a cool action sequence.
HDR (High Dynamic Range) is another feature worth getting cozy with. It’s particularly useful in high-contrast situations, like a sunset over the ocean or a dimly lit cathedral with bright stained glass windows. HDR takes multiple exposures and combines them, giving you a more balanced image with detail in both highlights and shadows.
Last but not least, let’s talk about RAW. No, not the sushi kind. Many phones now offer the option to shoot in RAW format, which captures more data and gives you more flexibility in editing. It’s like having a digital negative that you can develop later. Just be warned – RAW files take up more space, so make sure you’ve got the storage to spare.
Remember, these features are tools, not rules. Play around with them, experiment, and find what works best for you and the scene you’re trying to capture. The more you practice, the more intuitive it will become. Before you know it, you’ll be switching between modes and adjusting settings faster than a New York minute!
4. Edit Like a Pro: Post-Processing Magic
Alright, shutterbugs, you’ve captured your moments, but we’re not done yet! It’s time to sprinkle a little post-processing pixie dust on your photos. Now, I know what some of you might be thinking: “Isn’t editing cheating?” Well, if that’s cheating, then call me a big ol’ cheater-mc-cheater-pants, because a little editing can take your photos from “meh” to “marvelous” faster than you can say “filter”!
First things first, let’s talk apps. While your phone’s built-in editing tools can do a decent job, there’s a whole world of editing apps out there waiting to be explored. Some popular ones include Snapseed, VSCO, and Lightroom Mobile. These apps are like having a mini Photoshop in your pocket, minus the need for a degree in graphic design.
Now, before you go crazy with sliders and filters, remember the golden rule of editing: less is more. The goal is to enhance your photo, not to make it look like it was taken on Mars (unless, of course, you actually went to Mars, in which case, we need to talk about your travel budget).
Start with the basics: adjust brightness, contrast, and saturation. These three alone can work wonders. Brighten up those shadowy areas, bump up the contrast for some added punch, and tweak the saturation to make colors pop (but not explode – we’re going for “vibrant vacation,” not “psychedelic trip”).
Next, let’s talk about cropping. Sometimes, a little snip here and there can dramatically improve your composition. Maybe you want to get rid of that photobombing seagull, or perhaps you want to zoom in on a particular detail. Just remember the rule of thirds we talked about earlier!
Now, onto everyone’s favorite topic: filters. They’re like makeup for your photos – use them wisely, and they can enhance your image’s natural beauty. Overdo it, and well… let’s just say there’s a reason the “Instagram vs. Reality” meme exists. If you do use filters, try adjusting the intensity. Most apps allow you to dial it back, giving you a more subtle, natural look.
For those feeling a bit more adventurous, dive into the advanced tools. Play with curves to fine-tune contrast and color. Use selective adjustments to brighten just a specific area. Experiment with vignettes to draw focus to your subject. It’s like being a mad scientist, but instead of creating monsters, you’re creating masterpieces!
And here’s a pro tip: save your editing steps as a preset. If you find a combination of adjustments that really works for you, save it and apply it to other photos for a consistent look. It’s like having your own signature style, minus the need for a beret and a brooding expression.
Lastly, don’t forget about straightening and perspective correction. Nothing screams “amateur hour” like a crooked horizon or a leaning tower of Pisa (unless you’re actually in Pisa, then by all means, lean away). Most editing apps have tools to fix these issues with just a few taps.
Remember, editing is an art, not a science. There’s no one-size-fits-all approach. What works for a sunny beach scene might not work for a moody city night shot. So experiment, play around, and most importantly, have fun with it! After all, these are your memories you’re enhancing. Make them shine as brightly as the moments they represent!
Unveiling the Past: 10 Best Vacation Spots for History Enthusiasts
5. Tell Your Story: Capturing Moments, Not Just Images
Alright, my photo-savvy globetrotters, we’ve covered the technical stuff, the artsy-fartsy composition bits, and even dipped our toes into the editing pool. But now, let’s talk about the heart and soul of travel photography: storytelling. Because let’s face it, a picture might be worth a thousand words, but a picture with a story? That’s priceless.
First off, let’s get one thing straight: you’re not just taking photos, you’re capturing moments. That sunset isn’t just a pretty sky; it’s the end of an amazing day of exploration. That plate of strange-looking street food isn’t just lunch; it’s a culinary adventure. Start thinking of your camera as less of a image-capturing device and more of a story-collecting tool.
One way to tell better stories through your photos is to think in series. Instead of just snapping one shot of that charming local market, take several. Capture the overall scene, then zoom in on the colorful produce, the weathered hands of the vendor, the exchange of money. Together, these images weave a richer tapestry of the experience.
Don’t be afraid to include people in your shots – and I don’t just mean carefully posed portraits (though those can be great too). Capture candid moments: a child’s laughter, an old couple holding hands, a street performer in mid-act. These human elements bring your travel stories to life and help viewers connect emotionally with your images.
And speaking of emotions, try to capture the feeling of a place, not just its appearance. Is the city bustling and energetic? Try a slightly blurred shot of traffic to convey that sense of constant motion. Is the beach serene and peaceful? A minimalist composition with lots of negative space can evoke that tranquil vibe.
Remember, context is key. That ancient ruin might look cool, but a shot that includes both the ruin and the modern city surrounding it tells a more interesting story about the passage of time. The same goes for that quaint local festival – try to capture not just the main event, but the preparations, the audience reactions, the aftermath. It’s these little details that bring your travel tales to life.
Don’t forget about the power of juxtaposition. Contrasting elements in a single frame can create compelling narratives. The ultra-modern skyscraper looming over a traditional market, or a centuries-old temple next to a neon-lit convenience store. These images speak volumes about the place you’re visiting and its journey through time.
And here’s a tip that might seem counterintuitive: sometimes, the best way to tell the story of a place is to focus on the small, often overlooked details. The peeling paint on a weathered door, the intricate pattern on a local textile, the steam rising from a cup of coffee. These intimate glimpses can be just as evocative as sweeping vistas.
6. Embrace the Unexpected: Spontaneity in Travel Photography
Now, let’s talk about something that can’t be planned, practiced, or perfected: spontaneity. In the world of travel photography, some of the most magical moments happen when you least expect them. So, while it’s great to have a plan, don’t forget to embrace the unexpected!
First rule of spontaneous photography: always have your phone ready. You never know when that perfect shot will present itself. Maybe it’s a local cat stretching lazily in a patch of sunlight, or a sudden rainbow appearing after a quick tropical shower. These fleeting moments won’t wait for you to fumble with your phone, so keep it accessible.
Learn to shoot from the hip – literally. Sometimes, the most authentic shots come when your subjects don’t realize they’re being photographed. Practice taking photos without bringing your phone up to eye level. It takes some getting used to, but it can result in wonderfully candid, in-the-moment shots.
Don’t be afraid to get a little weird with your angles. Lie on the ground for a worm’s eye view of that impressive architecture. Climb up (safely, please!) for a bird’s eye view of the bustling market. These unusual perspectives can turn an ordinary scene into something extraordinary.
And here’s a challenge for you: try a photo walk with a twist. Give yourself a theme or a color to focus on, and see what you can capture. Maybe it’s “red things” or “circles” or “things that make you smile”. This little game can train your eye to notice details you might otherwise miss, and can result in a unique and cohesive set of images.
Alright, you’ve captured the moments, edited them to perfection, and now you’re sitting on a goldmine of amazing travel photos. But what next? How do you share these visual stories with the world (or at least with your long-suffering friends who’ve been subjected to your travel tales)?
First up, be ruthless in your selection. I know, I know, every single one of your 500 sunset photos is a unique and beautiful snowflake. But trust me, your audience will appreciate quality over quantity. Choose the images that best represent your journey, that evoke the strongest memories or emotions. A carefully curated collection of 20 stellar photos will have much more impact than a dump of 200 mediocre ones.
Consider creating themed albums or collections. Maybe it’s “Doors of Dublin” or “Flavors of Thailand” or “Faces of the Andes”. This approach not only makes your photos more engaging for viewers but also helps you see patterns and themes in your own work that you might not have noticed before.
When it comes to sharing on social media, think about the story you want to tell. Instead of posting chronologically, try creating a narrative arc. Start with an image that sets the scene, build up to your “hero” shots, and end with something that provides closure or reflection. And please, for the love of all that is holy, don’t forget to write captions! A well-crafted caption can elevate a good photo to greatness by providing context, humor, or insight.
For those of you feeling extra creative, why not try your hand at making a photo book? There are plenty of online services that make it easy to design and print your very own coffee table masterpiece. It’s a great way to preserve your memories and makes for a pretty impressive (albeit slightly self-indulgent) gift.
And finally, don’t underestimate the power of good old-fashioned prints. In this digital age, there’s something magical about holding a physical photograph. Choose a few of your absolute favorites to print and frame. Not only will they serve as daily reminders of your adventures, but they’re also great conversation starters when you have guests over.
Conclusion
Well, intrepid photographers, we’ve come to the end of our whirlwind tour through the world of smartphone travel photography. From mastering composition to harnessing the power of light, from editing like a pro to telling compelling visual stories, you’re now armed with the knowledge to take your travel photos from mundane to magnificent.
Remember, the best camera is the one you have with you, and chances are, that’s your phone. So the next time you find yourself in front of a breathtaking vista or in the midst of a vibrant local festival, don’t just snap a quick pic and move on. Take a moment. Breathe in the scene. Think about the story you want to tell. Then, armed with your newfound skills and your trusty phone, capture that moment in all its glory.
But here’s the most important tip of all: don’t get so caught up in taking photos that you forget to experience the moment. Your camera is a tool to enhance your travels, not to dominate them. Sometimes, the best thing you can do is put the phone down and simply be present.
So go forth, explore, and capture the world in all its beautiful, messy, unexpected glory. Your Instagram feed will thank you, your friends will be (mostly) grateful, and most importantly, you’ll have a treasure trove of memories to look back on. Happy shooting, and may your travels be as colorful as your photos!